
Content
- Problem
- Docker Installation
- Portainer Installation
Problem
Some Synology models don’t support Docker by default. For example on my Synology DS220j with SoC 4 GHz Realtek RTD1296 Quad-Core-Prozessor, which is ARM CPU by itself, you can not install Docker from Synology Package Center, because this model does’t support Docker. I think this will be true for another Synology models with ARM CPUs as well.
So let’s download and install docker binaries manually via CLI.
Docker Installation
First of all login to your Synology with SSH:
ssh YOUR_SYNOLOGY_IP -ladmin
Let’s see which CPU our Synology model has to define which Docker binary we have to download and install:
admin@nas-1:~$ sudo cat /proc/cpuinfo
Password:
processor	: 0
model name	: ARMv8 Processor rev 4 (v8l)
BogoMIPS	: 54.00
Features	: fp asimd evtstrm aes pmull sha1 sha2 crc32
CPU implementer	: 0x41
CPU architecture: 8
CPU variant	: 0x0
CPU part	: 0xd03
CPU revision	: 4

processor	: 1
model name	: ARMv8 Processor rev 4 (v8l)
BogoMIPS	: 54.00
Features	: fp asimd evtstrm aes pmull sha1 sha2 crc32
CPU implementer	: 0x41
CPU architecture: 8
CPU variant	: 0x0
CPU part	: 0xd03
CPU revision	: 4

processor	: 2
model name	: ARMv8 Processor rev 4 (v8l)
BogoMIPS	: 54.00
Features	: fp asimd evtstrm aes pmull sha1 sha2 crc32
CPU implementer	: 0x41
CPU architecture: 8
CPU variant	: 0x0
CPU part	: 0xd03
CPU revision	: 4

processor	: 3
model name	: ARMv8 Processor rev 4 (v8l)
BogoMIPS	: 54.00
Features	: fp asimd evtstrm aes pmull sha1 sha2 crc32
CPU implementer	: 0x41
CPU architecture: 8
CPU variant	: 0x0
CPU part	: 0xd03
CPU revision	: 4
So we have ARMv8 processor. As from Docker Download website following options are available:
Index of linux/static/stable/

../
aarch64/
armel/
armhf/
ppc64le/
s390x/
x86_64/
armhf should be supported for our CPU. In my case I downloaded following binary from Docker Website:
docker-20.10.9.tgz
Now let’s download, install and test docker from Synology CLI.
Download and extract Docker binary
admin@nas-1:~$ wget https://download.docker.com/linux/static/stable/armhf/docker-20.10.9.tgz
--2023-02-01 20:46:39--  https://download.docker.com/linux/static/stable/armhf/docker-20.10.9.tgz
Resolving download.docker.com... 2600:9000:224a:ae00:3:db06:4200:93a1, 2600:9000:224a:8400:3:db06:4200:93a1, 2600:9000:224a:5800:3:db06:4200:93a1, ...
Connecting to download.docker.com|2600:9000:224a:ae00:3:db06:4200:93a1|:443... connected.
HTTP request sent, awaiting response... 200 OK
Length: 57733557 (55M) [application/x-tar]
Saving to: 'docker-20.10.9.tgz'

docker-20.10.9.tgz                                                     100%[===========================================================================================================================================================================>]  55.06M  5.67MB/s    in 9.4s

2023-02-01 20:46:49 (5.86 MB/s) - 'docker-20.10.9.tgz' saved [57733557/57733557]
Here you have to replace docker-20.10.9.tgz with perhaps new version of binary available while you do installation. For me it was the last version of binary.
Now extract the binary:
admin@nas-1:~$ tar xvf docker-20.10.9.tgz
docker/
docker/docker-init
docker/containerd-shim
docker/containerd-shim-runc-v2
docker/containerd
docker/docker
docker/docker-proxy
docker/dockerd
docker/runc
docker/ctr
Now you have to copy all extract binaries to /usr/bin/ directory:
admin@nas-1:~$ sudo cp docker/* /usr/bin/And now the last step for our installation, just run Docker daemon:
admin@nas-1:~$ sudo dockerdThat’s it, Docker daemon is running now. Now we need some more additionally configuration, we need to configure Docker to store data in our Synology volume. Firstly list your Synology volumes:
mtalpal@de-hh-nas-1:~$ df -h
Filesystem         Size  Used Avail Use% Mounted on
/dev/md0           2.3G  1.5G  753M  67% /
devtmpfs           225M     0  225M   0% /dev
tmpfs              243M   24K  243M   1% /dev/shm
tmpfs              243M   14M  229M   6% /run
tmpfs              243M     0  243M   0% /sys/fs/cgroup
tmpfs              243M  808K  242M   1% /tmp
tmpfs               49M     0   49M   0% /run/user/196791
/dev/vg1/volume_1  3.6T  654G  3.0T  18% /volume1
Our volume name is /volume1.
Now let’s create directory for Docker in this volume and configure Docker to store date there;
mkdir /volume1/docker{
"storage-driver": "vfs",
"iptables": false,
"bridge": "none",
"data-root": "/volume1/docker"
}After all these steps I recommend to reboot your Synology.
sudo rebootTesting if Docker is working
After reboot we can test our Docker configuration.
Run Docker daemon and then run hello-world container from docker. Im my case hello-world container was not existing locally and Docker dowloaded and installed it automatically. Anyway, if everything working fine you will see following output of hello-world container:
admin@nas-1:~$ sudo docker run hello-world
Password:

Hello from Docker!
This message shows that your installation appears to be working correctly.

To generate this message, Docker took the following steps:
 1. The Docker client contacted the Docker daemon.
 2. The Docker daemon pulled the "hello-world" image from the Docker Hub.
    (arm64v8)
 3. The Docker daemon created a new container from that image which runs the
    executable that produces the output you are currently reading.
 4. The Docker daemon streamed that output to the Docker client, which sent it
    to your terminal.

To try something more ambitious, you can run an Ubuntu container with:
 $ docker run -it ubuntu bash

Share images, automate workflows, and more with a free Docker ID:
 https://hub.docker.com/

For more examples and ideas, visit:
 https://docs.docker.com/get-started/
If you see this output then everything is good, you installed and configured docker on ARM Synology successfully!
Install Portainer
Portainer is a management tool for Docker Containers. As you don’t have Docker App in your Synology web GUI, we will install Portainer and use it as GUI for Docker.
First of all let’s create configuration file for docker-compose. Create new file docker-compose.yml and put following code into this file:
version: '2'

services:
  portainer:
    image: portainer/portainer
    restart: unless-stopped
    network_mode: host
    volumes:
      - /var/run/docker.sock:/var/run/docker.sock
      - portainer_data:/data

volumes:
  portainer_data:
Then run:
docker-compose up -dNow you should be able to see our „portainer“ container:
admin@nas-1:~$ sudo docker container ls
CONTAINER ID   IMAGE                 COMMAND        CREATED       STATUS         PORTS     NAMES
ea1a5e5030a1   portainer/portainer   "/portainer"   2 hours ago   Up 3 seconds             docker_portainer_1
Now you can access Portainer via browser. Portainer is running under port 9000, so place following link into your browser:
http://YOUR_SYNOLOGY_IP:9000You will get Portainer GUI where your admin username and password have to be created. And then enjoy it:
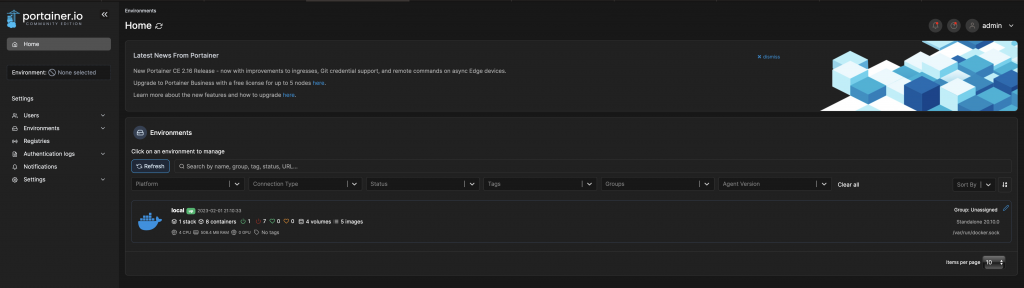
Congratulation, you have installed and configured Docker with Portainer as a GUI for it on your ARM Synology device! Have fun!